A paperback cover is not simply a front-cover image.
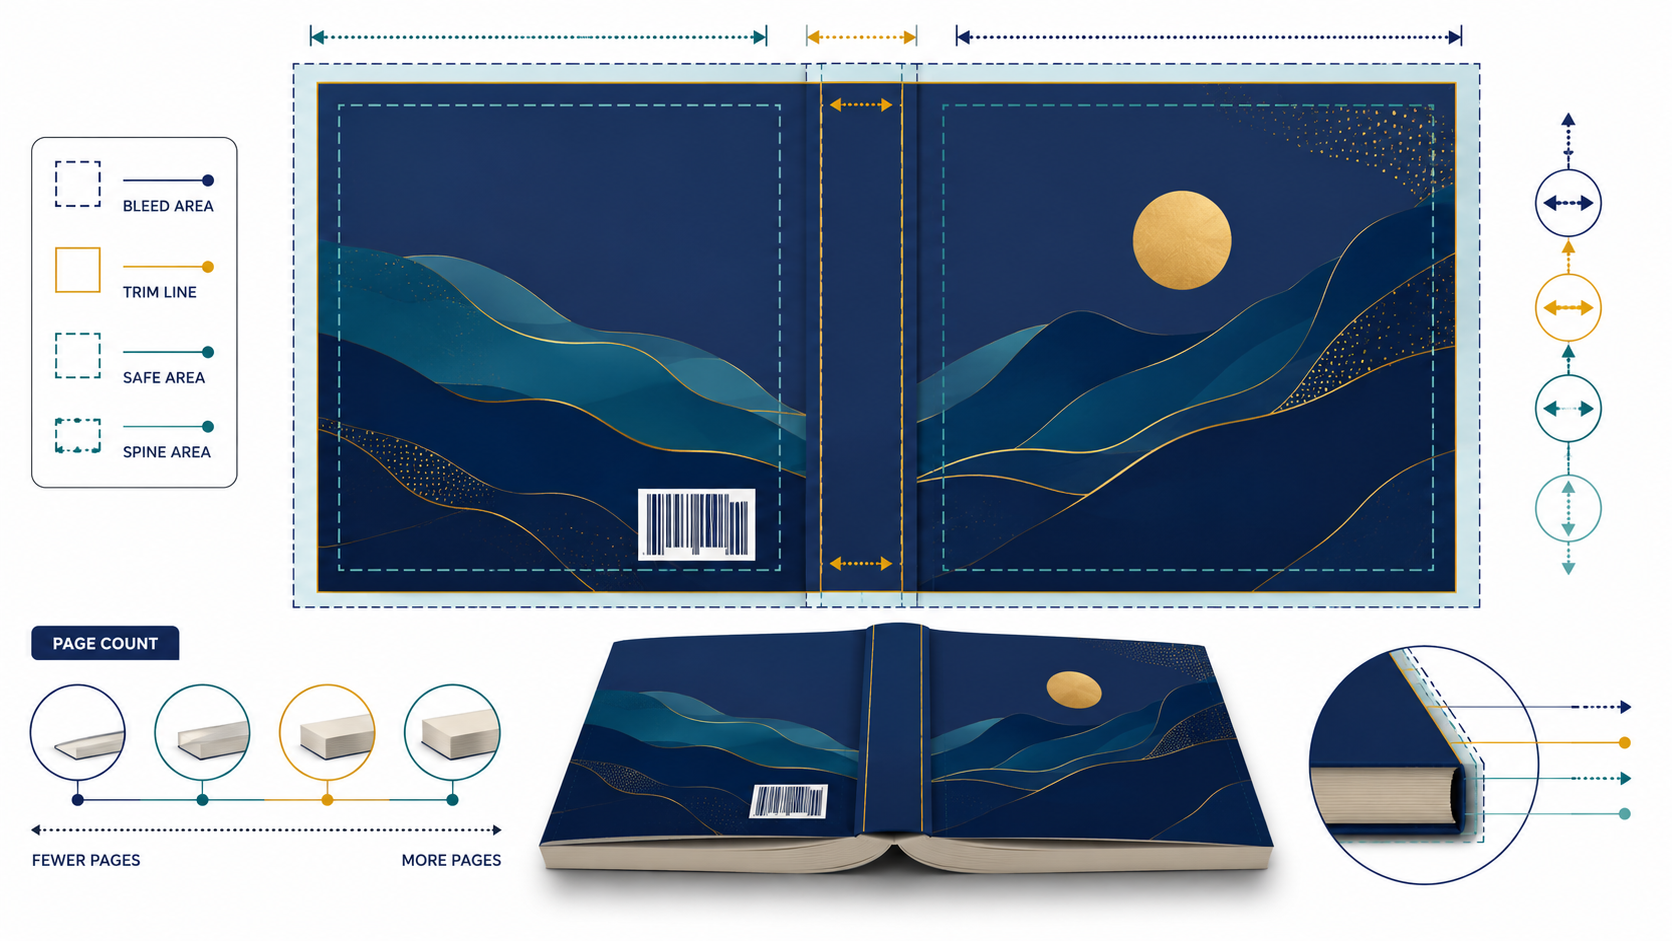
For Amazon KDP, the uploaded print-cover file is normally one continuous spread containing:
- the back cover;
- the spine;
- the front cover;
- bleed around the outside edges.
The exact width of this file changes according to the book’s trim size, page count, paper type and printing options.
That is why two books with the same 6 × 9-inch trim size may still require different cover dimensions.
In this guide, you will learn how a KDP paperback cover is constructed, what determines the spine width and how to use the correct measurements before exporting your final cover PDF.
What Is a Full Paperback Cover?
A full paperback cover is a single horizontal design that wraps around the printed book.
From left to right, it contains:
- the back cover;
- the spine;
- the front cover.
The file also includes bleed beyond the outer boundaries. This extra artwork is trimmed during production and helps prevent unintended white edges.
The front and back panels are each based on the selected trim width and height. The spine is inserted between them and varies according to the physical thickness of the interior pages.
KDP requires a print cover to be supplied as one continuous image rather than as separate front, back and spine files.
Why the Front Cover Alone Is Not Enough
The front cover is only one section of the complete paperback design.
A print-ready cover must account for several additional areas:
Back cover
This may contain the book description, endorsements, publisher information, an author biography or other supporting material.
Spine
The spine connects the front and back panels. Depending on its width, it may contain the title, author name or publisher mark.
Barcode area
KDP can place a barcode on the back cover when one has not already been included in the uploaded design.
Bleed
Artwork must extend beyond the final cut edge so slight trimming variation does not create white lines.
Safe areas
Important text and graphics should remain away from the trim boundaries, spine folds and other areas where they may be cut or distorted.
A cover that looks correct as a standalone front image may therefore fail when placed into the complete wraparound layout.
Complete the Interior Before Sizing the Cover
The final cover should be created only after the interior is complete.
The interior determines the final page count, and the page count affects the thickness of the spine. Even a small change to the manuscript can alter the required cover width.
For example, adding recipes, illustrations, blank pages or front matter may increase the page count. Removing chapters or changing the typography may reduce it.
If the cover was sized using an earlier estimate, its spine may no longer align correctly after the interior is uploaded.
KDP specifically advises publishers to finalize the interior and obtain the final page count before preparing the accurately sized print cover.
“The final page count is a cover measurement, not merely an interior statistic.”
What Determines KDP Cover Size?
A paperback’s complete cover dimensions depend on several connected settings.
1. Trim size
The trim size is the final width and height of one interior page after cutting.
A 6 × 9-inch paperback has a six-inch-wide front panel and a six-inch-wide back panel before bleed is included.
2. Final page count
A larger number of pages generally creates a wider spine.
3. Paper type
Different paper types have different thicknesses. The same page count may therefore produce a different spine width depending on the paper selected.
4. Ink and print options
The selected print configuration determines which paper and page-count combinations are available.
5. Bleed
The complete cover requires bleed around its outside edges.
6. Binding and cover format
Paperback and hardcover covers are constructed differently and require separate cover files. The same cover measurements should not be used for both formats.
Understanding the Cover-Width Formula
A paperback cover can be understood with this basic structure:
Full cover width = back cover width + spine width + front cover width + horizontal bleed
For a standard paperback cover, the horizontal bleed includes additional space at the far-left and far-right outside edges.
The overall height can be understood as:
Full cover height = trim height + top bleed + bottom bleed
KDP requires 0.125 inches of bleed at the top, bottom and outside edges of a paperback cover.
This means the final height is generally:
Trim height + 0.25 inches
For example, a 9-inch-high paperback requires a full cover height of:
9 + 0.125 + 0.125 = 9.25 inches
The full width cannot be determined until the spine width is known.
Example: A 6 × 9-Inch Paperback
Imagine a paperback with these specifications:
- trim size: 6 × 9 inches;
- completed interior: 120 pages;
- selected paper: white;
- cover format: paperback.
The front panel is six inches wide.
The back panel is also six inches wide.
The height before bleed is nine inches.
The complete width would therefore be:
6-inch back cover + calculated spine width + 6-inch front cover + 0.25 inches of horizontal bleed
The complete height would be:
9 inches + 0.25 inches of vertical bleed = 9.25 inches
The exact spine width should come from the current KDP Cover Calculator or downloaded template rather than from an estimate.
How Is the Spine Width Calculated?
The spine width represents the thickness of the bound interior pages.
It is affected primarily by:
- page count;
- paper type;
- printing configuration.
A simplified spine calculation multiplies the number of pages by the thickness assigned to the selected paper. However, using a manually remembered multiplier can lead to errors when specifications or print options change.
The safer workflow is to enter the book’s exact specifications into KDP’s Print Cover Calculator and download a current template.
The calculator uses the selected binding type, interior type, paper type, page-turn direction, measurement units, trim size and page count to generate the required dimensions. It also provides PDF and PNG template files that can be imported into design software as a guide layer.
Why You Should Use the KDP Cover Calculator
The KDP Cover Calculator reduces the risk of combining the wrong measurements.
It helps determine:
- the complete cover width;
- the complete cover height;
- the exact spine width;
- front- and back-panel boundaries;
- bleed boundaries;
- safe areas;
- barcode placement guidance.
To use it, prepare the following information:
- binding type;
- interior colour or print type;
- paper type;
- page-turn direction;
- measurement units;
- trim size;
- final page count.
After entering the specifications, download the generated template and use it as a temporary guide inside your cover-design software.
The template should match the exact settings selected for the KDP book. A template generated for cream paper, for example, should not automatically be reused for a version printed on white paper.
How to Read a KDP Cover Template
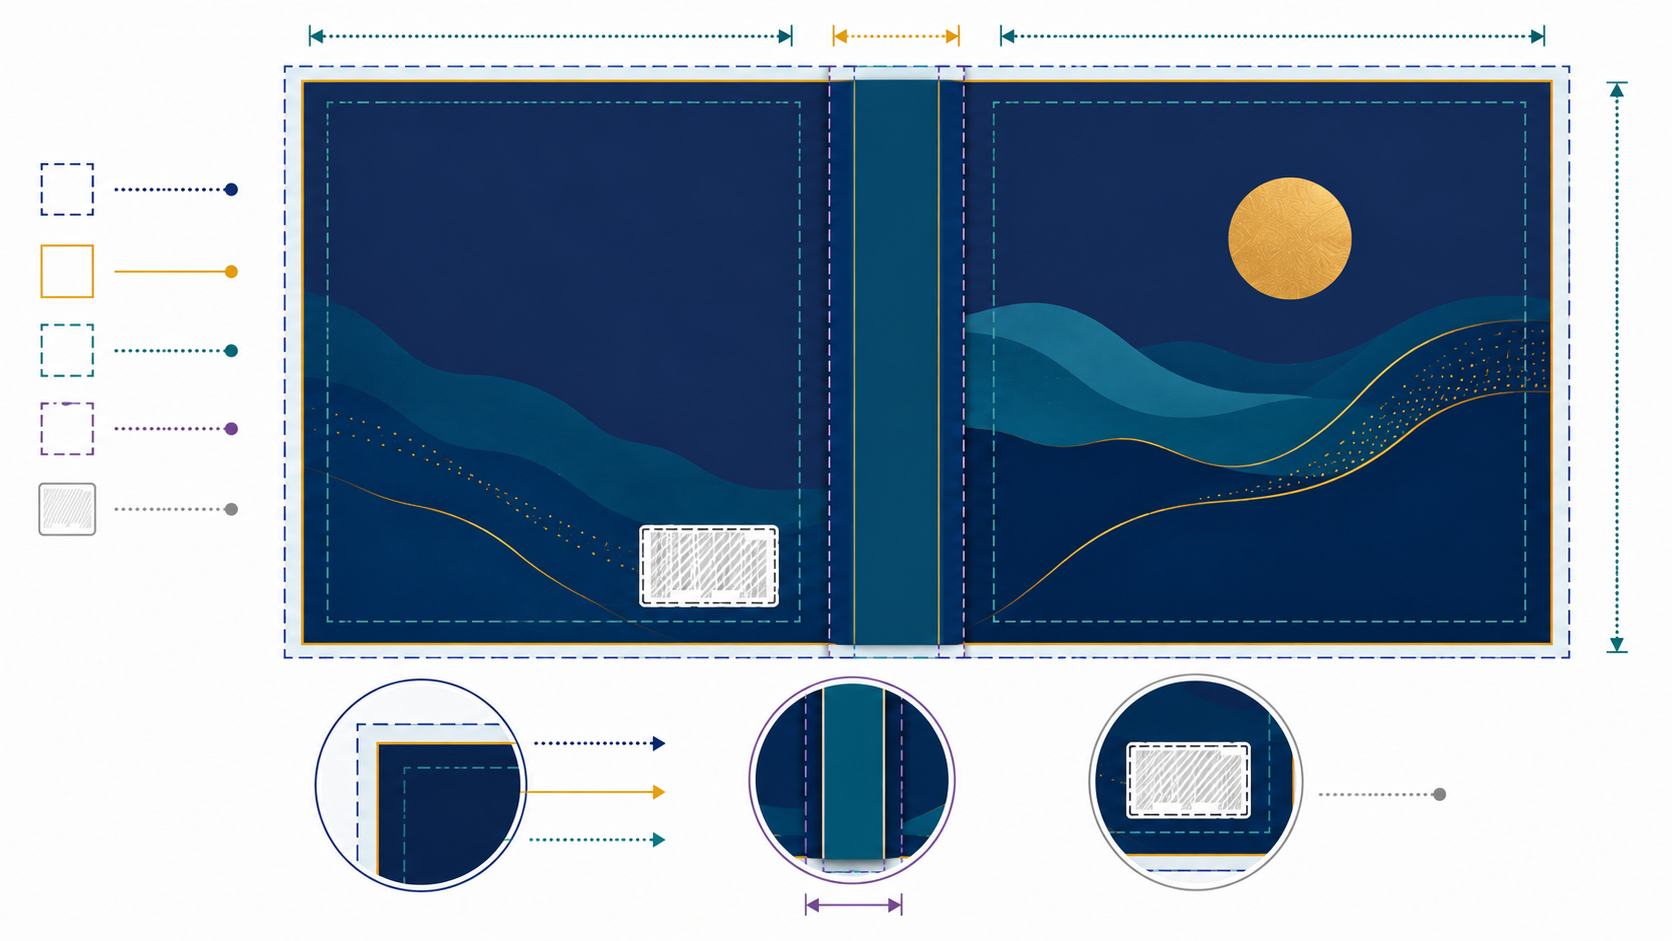
A downloaded template visually separates the cover into production areas.
Although the exact appearance may vary, it normally helps you identify the following:
Front-cover panel
The right-hand portion of the spread.
Back-cover panel
The left-hand portion of the spread.
Spine
The narrow vertical area between the front and back panels.
Trim boundaries
The lines showing where the printed cover is expected to be cut.
Bleed area
The outer region beyond the trim boundaries.
Safe area
The region where important text and graphics should remain.
Barcode area
A reserved region on the back cover where KDP may place the barcode.
The guide should be treated as an alignment reference, not as part of the final artwork.
Keep the template on its own layer, lower its opacity when necessary and lock it so it cannot shift accidentally.
Where Each Cover Element Belongs
Front cover
Place the title, subtitle, author name and primary imagery inside the front-panel boundaries.
The central subject should not unintentionally cross into the spine unless the design was intentionally created as a continuous wraparound composition.
Spine
Centre spine text within the spine panel rather than across the entire document.
Leave comfortable space above and below the title so the text does not appear crowded.
Back cover
Position the blurb and supporting information within the back-cover safe area.
Avoid placing essential text inside the barcode region.
Background artwork
Background colours, photographs and illustrations intended to reach the edge should continue beyond the trim line and through the bleed area.
Important text and logos
Keep these within the recommended safe regions. Do not position them directly beside cut lines or spine folds.
When Can You Add Text to the Spine?
A very thin book may not have enough spine width for readable text.
KDP currently indicates that books need at least 79 pages before spine text can be included.
Meeting the minimum page count does not always mean the spine text will look attractive. The actual space also depends on the selected paper and the length of the title.
For a narrow spine:
- use a short title;
- select a clean, readable typeface;
- avoid unnecessary subtitles;
- omit decorative elements that compete for space;
- consider leaving the spine blank when the wording would be too small.
Do not reduce the text until it becomes difficult to read merely to force it onto the spine.
Spine Text Direction and Alignment
Spine text should be consistent with the reading direction and the book’s overall cover design.
The most important requirement is that the text remains fully inside the spine area and does not drift onto the front or back cover.
Use the template’s spine boundaries rather than visually guessing the centre.
For a standard left-to-right book, the cover spread is normally arranged with:
- the back cover on the left;
- the spine in the centre;
- the front cover on the right.
A common mistake is to design the spread in the reverse order because the creator imagines the physical book while it is closed rather than the flattened cover file.
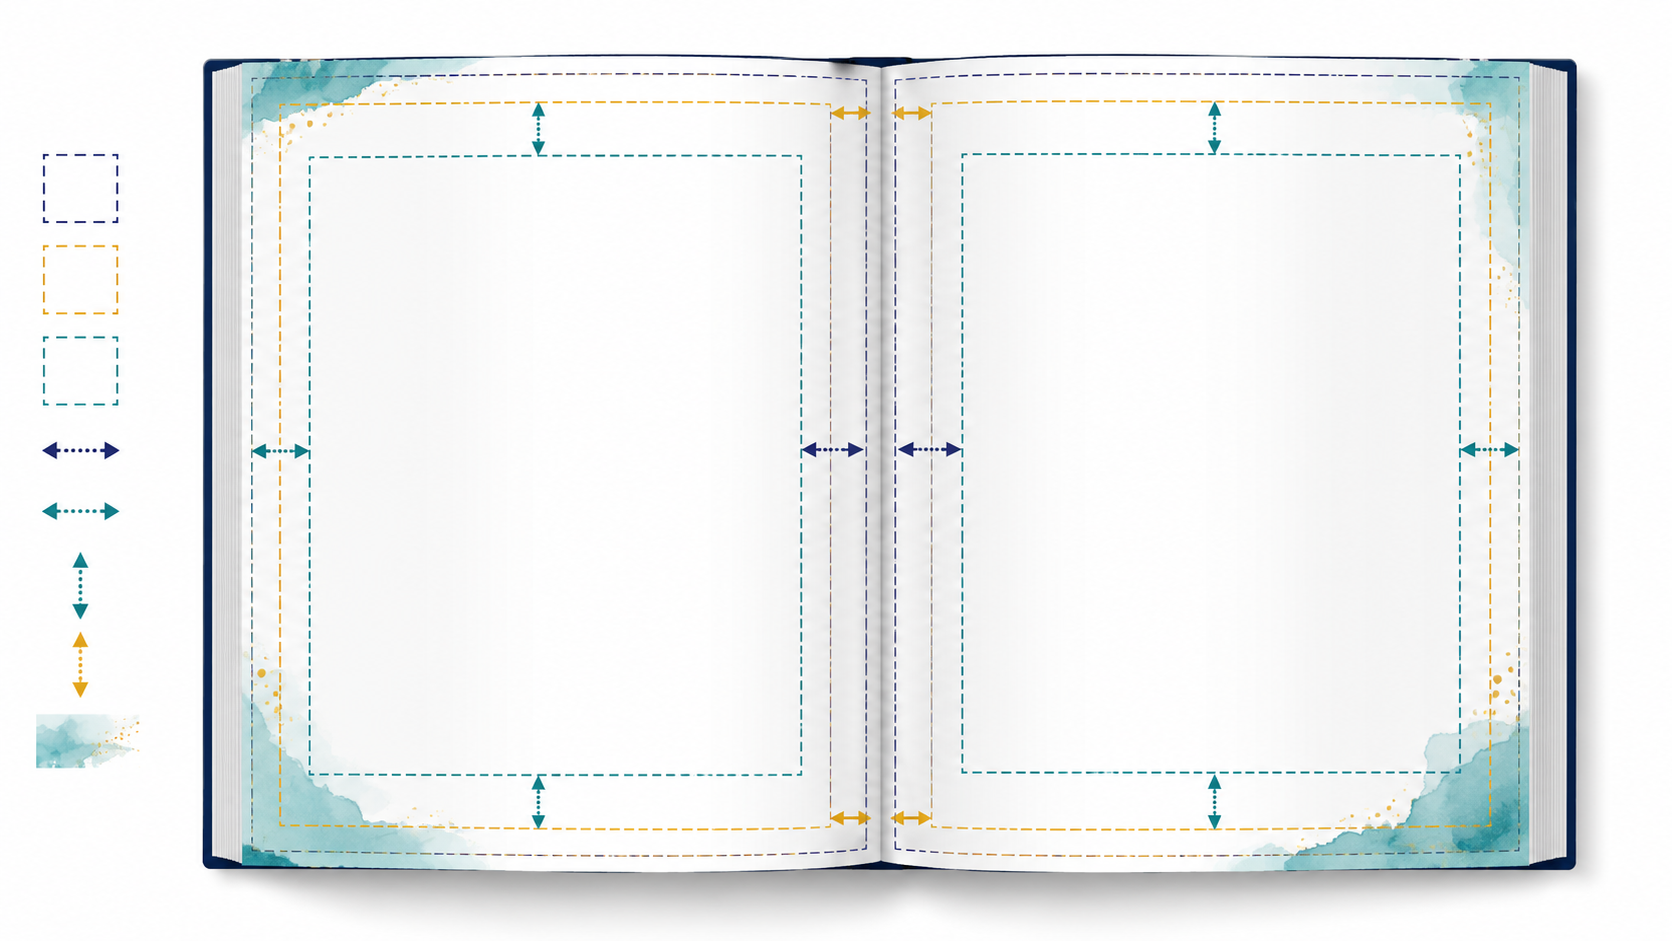
Paperback Cover Bleed Explained
Bleed is required around the outside edges of a paperback cover.
KDP’s paperback guidance instructs publishers to add 0.125 inches to the top, bottom and outside edges of the cover.
For a complete spread, this means artwork should extend:
- 0.125 inches beyond the far-left edge;
- 0.125 inches beyond the far-right edge;
- 0.125 inches beyond the top;
- 0.125 inches beyond the bottom.
Background artwork should fill these areas completely.
Do not extend important text into the bleed. The bleed is expected to be trimmed away, and small variations can occur during cutting.
The Barcode Area on the Back Cover
The back cover normally needs space for a barcode.
When KDP supplies the barcode, avoid placing important material in the designated barcode region shown on the template.
A background colour or nonessential artwork can continue through the area, but do not place any of the following there:
- important blurb text;
- an author photograph;
- a publisher logo;
- an endorsement;
- a QR code;
- critical illustration details.
Even when the background is visually busy, the barcode needs enough contrast and clear surrounding space to remain usable.
Keeping the lower back-cover area relatively simple often produces a cleaner result.
Paperback and Hardcover Covers Are Not the Same
A paperback cover template should not be reused for a hardcover edition.
KDP’s hardcover books use case-laminate construction, where the printed cover artwork wraps around solid case boards. This introduces hardcover-specific areas such as the wrap and spine hinge.
Paperback and hardcover versions may be able to use the same interior manuscript when their trim specifications are compatible, but they require separately prepared cover files.
For a hardcover edition:
- select hardcover in the Cover Calculator;
- enter the hardcover’s exact print settings;
- download a new hardcover template;
- adjust the design to its wrap, hinge and safe-area guidance;
- do not simply stretch the paperback artwork.
Important elements may need to move inward because hardcover construction affects the visible cover area differently.
Common KDP Cover-Sizing Mistakes
1. Designing the cover before finishing the interior
Later page-count changes make the original spine width inaccurate.
2. Uploading only the front cover
A custom paperback-cover PDF needs the back, spine and front in one continuous file.
3. Using the trim size as the complete cover size
A 6 × 9-inch book does not use a 6 × 9-inch full-cover PDF.
4. Forgetting bleed
Artwork that stops at the trim line may produce visible white edges after cutting.
5. Reusing a template from another book
A different page count or paper type may require a different spine width.
6. Using a paperback template for a hardcover
The two formats use different cover construction and measurements.
7. Placing text too close to the edges
Titles, author names and blurbs can be cut or appear uncomfortably close to the trim.
8. Placing important content in the barcode area
KDP’s barcode can cover that material.
9. Including the template in the exported cover
Guide lines and placeholder text should not appear in the finished artwork.
10. Distorting the cover to fit a new template
Stretching a completed design can warp typography, illustrations and author photographs.
How to Use the Template in Your Design Software
The exact commands vary between Canva, Affinity Publisher, Affinity Photo, Adobe InDesign and other applications, but the workflow is similar.
Step 1: Generate the exact template
Use the final page count and selected KDP print settings.
Step 2: Create a document at the template’s full dimensions
Do not create only the front-cover panel.
Step 3: Import the template
Place the PDF or PNG template on a separate layer.
Step 4: Match the template precisely
Do not scale it by eye. Confirm that it reaches the correct document boundaries.
Step 5: Lock the template layer
This prevents accidental movement.
Step 6: Build the artwork underneath or above it
Keep backgrounds through the bleed while keeping essential content inside the safe areas.
Step 7: Hide or delete the template layer
Guide lines and template wording must not be included in the finished cover.
Step 8: Export the final cover
Export a print-quality PDF at the exact document dimensions.
Step 9: Inspect the PDF
Reopen the exported file and check its dimensions, artwork, text and panel alignment before uploading it.
Should You Design in Pixels or Inches?
A print cover is best understood through physical measurements such as inches or millimetres because KDP’s required dimensions describe the final printed object.
Some design tools use pixels. In that case, the pixel dimensions depend on the chosen resolution.
At 300 pixels per inch:
Pixel width = width in inches × 300
Pixel height = height in inches × 300
For example, a document measuring 12.5 × 9.25 inches would equal:
- 3,750 pixels wide;
- 2,775 pixels high;
when created at 300 pixels per inch.
However, do not choose arbitrary pixel dimensions and assume they represent the required physical size. Confirm that the exported PDF retains the exact width and height specified by the KDP template.
How to Check the Finished Cover Before Uploading
Inspect the cover at full size and thumbnail size.
At full size, confirm that:
- the PDF dimensions match the downloaded template;
- the back cover is on the left;
- the front cover is on the right;
- the spine is correctly centred;
- backgrounds extend through the bleed;
- important text remains inside safe areas;
- the barcode region is clear;
- no template lines remain visible;
- images and text are sharp;
- nothing has shifted during export.
At thumbnail size, confirm that:
- the title remains readable;
- the main visual subject is recognizable;
- the front cover has a clear hierarchy;
- the design does not become confusing when reduced.
Finally, upload the cover with the completed interior and inspect the result in KDP’s previewing workflow.
Automated checks can identify technical problems, but you should still examine the front cover, spine and back cover visually.
Should You Order a Printed Proof?
A digital preview cannot fully reproduce the physical appearance of a printed cover.
A printed proof lets you inspect:
- actual colour reproduction;
- title readability;
- spine alignment;
- trim positioning;
- back-cover spacing;
- barcode placement;
- image sharpness;
- matte or glossy finish;
- how the design feels at the real trim size.
This is particularly important for books with:
- narrow spine text;
- thin borders;
- small back-cover copy;
- detailed illustrations;
- dark photographic backgrounds;
- design elements crossing the spine;
- precise front-to-back alignment.
Review the proof under normal lighting and hold it at the distance a customer would naturally use.
KDP Paperback Cover Checklist
Before uploading your cover, confirm that:
- The interior manuscript is final.
- The final page count has been confirmed.
- The selected paper type matches the template.
- The binding and print options match the KDP setup.
- The template was generated specifically for this edition.
- The back cover is on the left.
- The front cover is on the right.
- The spine width matches the template.
- Spine text is used only when the book is thick enough.
- Background artwork extends through the bleed.
- Important elements remain inside safe areas.
- The barcode region does not contain essential content.
- The complete cover is one continuous spread.
- The document has not been stretched or distorted.
- The guide template has been removed before export.
- The PDF retains the correct physical dimensions.
- Fonts and images appear clear.
- The uploaded cover has been visually inspected.
- A physical proof has been considered before publication.
Final Thoughts
Correct KDP cover sizing becomes much easier when you stop thinking of the cover as a single front image.
A paperback cover is a measured production file containing the back panel, spine, front panel and bleed.
The trim size establishes the two main panels. The page count and paper type determine the spine. The bleed protects artwork at the outer edges. The template brings these measurements together into one accurate layout.
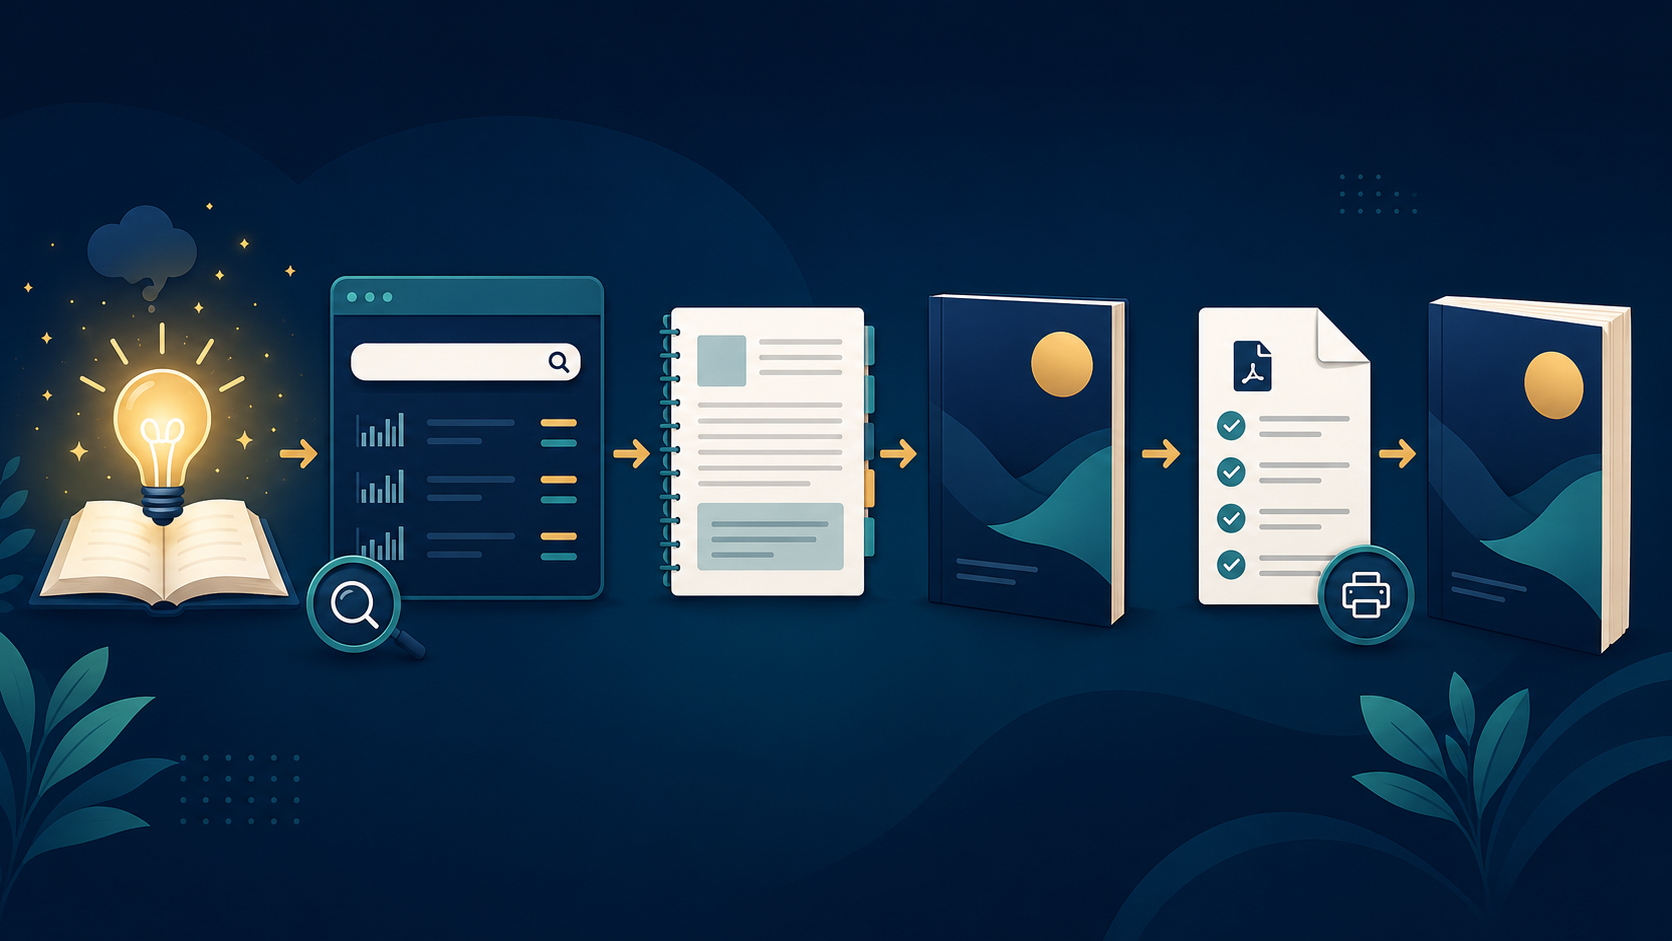
Finish the interior first, generate a template for the exact edition and build the artwork around that template rather than relying on estimates.
That process helps prevent rejected files, off-centre spines, cropped text and unnecessary redesigns.