Designing the first recipe page in Canva is usually enjoyable.
Designing the sixty-third page—and discovering that the ingredients, images and instructions no longer fit the template—is where the project becomes difficult.
Many first-time cookbook creators approach Canva as though every page should be individually designed. They choose a beautiful layout, insert one recipe and then attempt to force every remaining recipe into the same amount of space.
That works until they encounter:
- a recipe with twenty ingredients;
- a dish requiring twelve preparation steps;
- a long recipe title;
- several substitutions or storage notes;
- a photograph that does not fit the original frame;
- a section containing an odd number of pages.
A professional recipe book should not be built as dozens of unrelated Canva pages.
It should be built from a small system of reusable layouts designed around the real content.
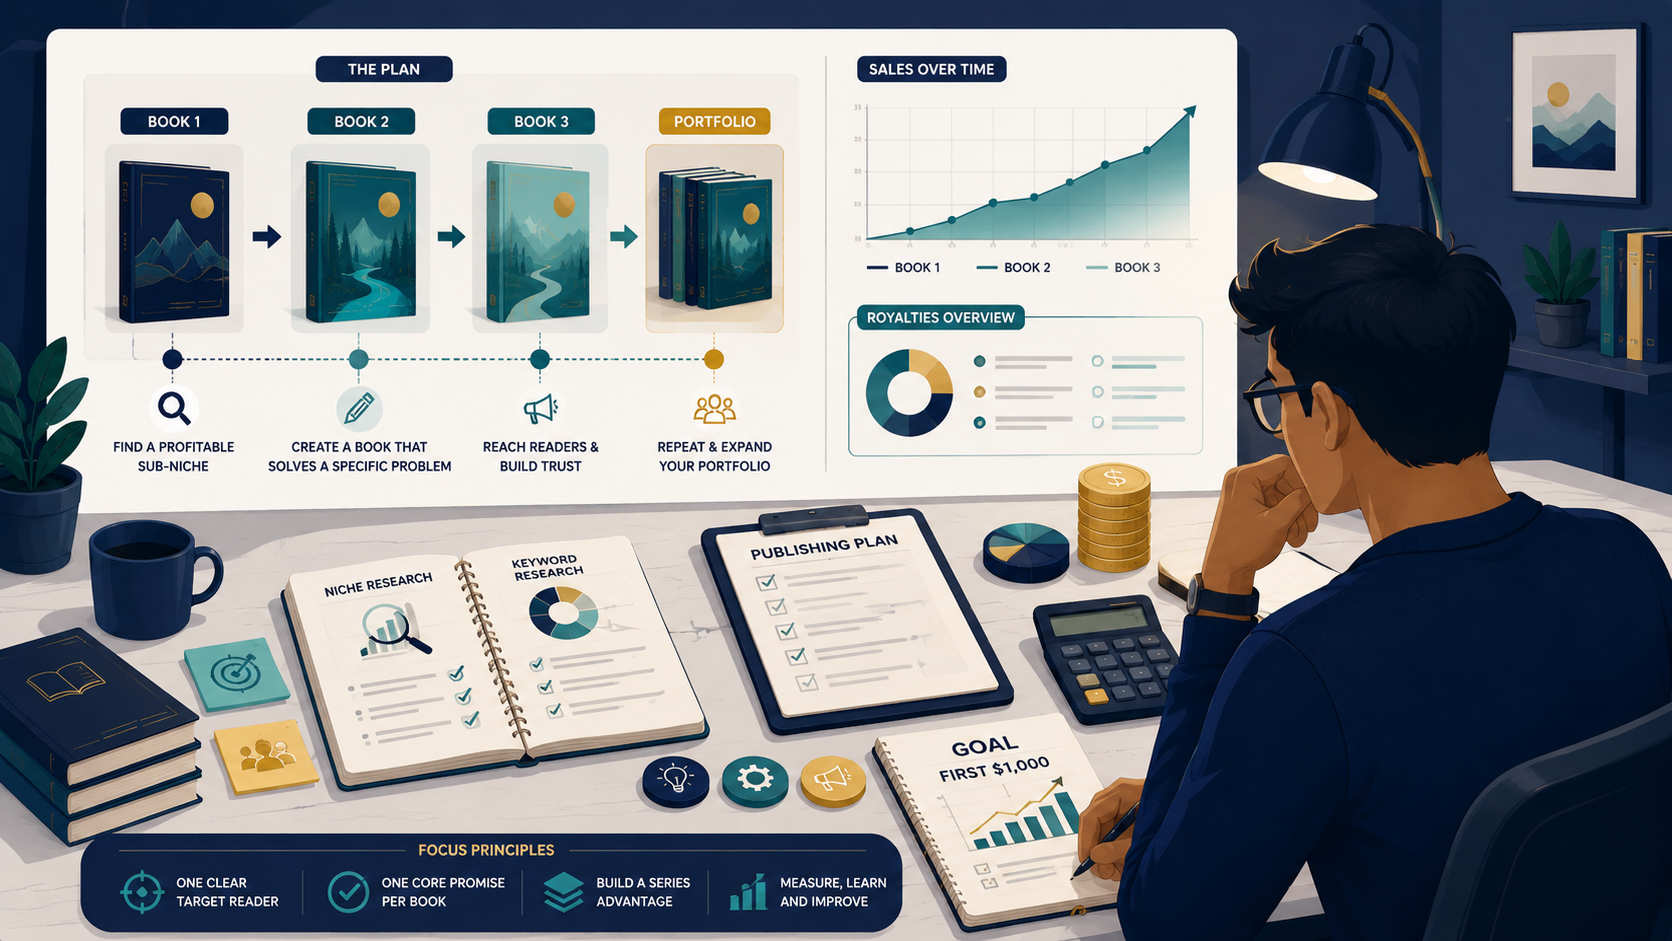
In this guide, you will learn how to plan the cookbook with KCanvas, construct the visual pages in Canva and inspect the exported PDF before uploading it to Amazon KDP.
What Are You Actually Creating?
Before opening Canva, define the type of recipe book you intend to publish.
“Cookbook” is only a format. It does not describe the reader, the problem or the promise.
Compare these concepts:
- a general collection of family recipes;
- a beginner air-fryer cookbook;
- a high-protein meal-preparation cookbook;
- a five-ingredient dinner cookbook;
- a baking book for children;
- a festive dessert cookbook;
- a cookbook for people managing a particular dietary preference;
- a blank recipe journal for readers to complete themselves.
Each project needs a different content structure and visual system.
A children’s baking book may require large typography, illustrated steps and generous spacing. A premium dessert book may depend on full-page photography. A meal-preparation guide may need storage instructions, portion information and weekly planning pages.
Before designing anything, write down:
- Who is the primary reader?
- What cooking problem does the book solve?
- What experience level does the reader have?
- What equipment or ingredients can you assume they own?
- What should become easier after they use the book?
- Why would they choose this cookbook instead of a broader alternative?
The answer should become one clear promise.
For example:
A beginner-friendly air-fryer cookbook that helps busy households prepare quick, practical dinners with familiar ingredients.
That promise can guide the title, recipe selection, page structure, photography and cover.
Decide Whether the Book Is Commercial or Personal
A personal recipe book created for family members can be designed almost entirely around your own preferences.
A commercial cookbook intended for Amazon KDP has additional responsibilities.
You need to consider:
- whether the concept serves an identifiable audience;
- whether the recipes are sufficiently useful and distinct;
- whether the retail price can support the printing cost;
- whether the interior will be black and white or colour;
- whether you have permission to use every photograph and graphic;
- whether ingredient and preparation information is accurate;
- whether the finished PDF meets KDP’s technical requirements.
KDP’s printing costs vary according to factors including marketplace, page count, trim size, paper and ink options. Its calculator can estimate the printing cost, minimum list price and likely royalty before publication. Kindle Direct Publishing
A full-colour cookbook may look more appealing, but it normally creates a very different pricing situation from a black-and-white interior.
Estimate the economics before committing to one hundred colour photographs.
Step 1: Plan the Entire Cookbook Before Opening Canva
Canva should be the construction environment, not the place where you invent the book one page at a time.
Prepare a complete content plan first.
A typical recipe book may include:
Front matter
- half-title page;
- title page;
- copyright and disclaimer page;
- dedication;
- introduction;
- how to use the book;
- equipment guide;
- ingredient guidance;
- measurement conversions;
- table of contents.
Main content
- section-opening pages;
- recipes;
- cooking tips;
- technique explanations;
- ingredient substitutions;
- meal plans;
- preparation charts.
Back matter
- cooking-time reference;
- measurement conversion table;
- recipe index;
- ingredient index;
- acknowledgements;
- about the author;
- invitation to explore related books.
Not every cookbook needs all these elements. Include only material that helps the intended reader.
Use KCanvas to turn the initial concept into an organised table of contents before committing to the visual layout. The objective is to understand the complete page ecosystem:
- how many sections the book needs;
- how many recipes belong in each section;
- which non-recipe pages are necessary;
- where section openers will appear;
- how many recurring page types must be designed.
This prevents the interior from becoming a random sequence of recipe pages.
Step 2: Build a Recipe Inventory
Create a spreadsheet or structured list containing every proposed recipe.
Useful columns include:
| Field | Purpose |
|---|---|
| Recipe title | The final working name |
| Section | Breakfast, dinner, dessert or another category |
| Difficulty | Beginner, intermediate or advanced |
| Preparation time | Active preparation |
| Cooking time | Time under heat |
| Total time | Complete expected duration |
| Yield | Servings or quantity |
| Ingredient count | Helps predict page length |
| Instruction count | Helps choose a layout |
| Photo required | Yes or no |
| Photo status | Planned, generated, licensed or completed |
| Nutrition status | Verified, pending or omitted |
| Notes | Storage, substitutions or special warnings |
| Layout type | Short, standard, long or two-page |
This inventory helps you estimate how many recipes will fit each page type.
It also reveals weaknesses before design begins.
For example:
- one section may contain only three recipes while another contains thirty;
- several recipe names may sound too similar;
- too many recipes may depend on the same core ingredients;
- the book may promise beginner recipes while containing advanced techniques;
- some entries may be too short to justify full pages;
- several recipes may need two-page layouts.
KCanvas can support the early planning stage by helping you organise the concept, section architecture, recipe categories and individual content requirements. Canva then becomes much easier to use because the structure has already been settled.
“A cookbook becomes easier to design when every recipe has already been assigned a role, section and page type.”
Step 3: Standardise the Recipe Structure
Readers should not have to relearn the page every time they begin a new recipe.
Decide which information every recipe must contain and use the same sequence throughout the book.
A practical structure might be:
- recipe title;
- short introduction;
- preparation time;
- cooking time;
- total time;
- servings;
- difficulty;
- ingredient list;
- numbered method;
- temperature;
- serving suggestion;
- substitution note;
- storage guidance;
- nutrition information, when accurately available.
Do not include fields merely because another cookbook uses them.
For example, a simple drinks book may not need difficulty ratings. A meal-preparation cookbook may need refrigeration and reheating instructions on almost every page. An air-fryer cookbook may need basket size, preheating guidance and cooking temperature.
Create a recipe-content template before entering the recipes into Canva.
Example recipe-content template
Recipe title
One- or two-sentence introduction explaining the dish and its main appeal.
Preparation time:
Cooking time:
Total time:
Servings:
Difficulty:
Ingredients
- Ingredient one
- Ingredient two
- Ingredient three
Method
- First instruction.
- Second instruction.
- Third instruction.
Beginner tip
A useful warning or technique.
Storage
How and how long the dish can reasonably be stored.
The purpose of this content template is consistency. It also lets you identify recipes with missing information before the layout stage.
Step 4: Edit the Recipes Before Formatting Them
Do not treat Canva as your primary writing and editing environment.
Complete the main recipe editing elsewhere before placing the material into the final design.
Check every recipe for:
- missing ingredients;
- ingredients that never appear in the method;
- ingredients used in the method but absent from the list;
- inconsistent measurement units;
- unclear temperatures;
- unexplained abbreviations;
- steps that assume knowledge the intended reader may not have;
- unrealistic preparation or cooking times;
- inconsistent serving quantities;
- duplicated instructions;
- storage statements that need verification;
- unsupported nutrition claims;
- inconsistent spelling and punctuation.
Test recipes where practical and verify factual claims carefully.
AI-assisted drafting can help organise recipes, but generated cooking instructions should not be accepted without review. Small errors involving quantity, timing or temperature can make a recipe unusable.
The final cookbook should reflect deliberate editorial judgment rather than a collection of unverified outputs.
Step 5: Choose the Trim Size Before Creating the Canva File
Trim size is the finished width and height of each printed page after cutting.
A recipe book often benefits from a larger trim size because it needs room for:
- ingredient lists;
- numbered directions;
- photographs;
- time and serving information;
- tips and substitutions;
- readable type.
However, larger is not automatically better.
A wide layout may appear attractive on a screen but feel awkward to hold in a kitchen. A smaller book may be easier to handle but require more pages or smaller photographs.
KDP supports several print sizes and also allows certain custom paperback dimensions within its permitted range. The selected trim size needs to match the dimensions of the uploaded manuscript. Kindle Direct Publishing
Possible cookbook sizes include:
- 6 × 9 inches for compact, text-led cookbooks;
- 7 × 10 inches for a balance of text and photography;
- 8 × 10 inches for a more visual layout;
- 8.5 × 11 inches for workbooks, large-format cookbooks and highly visual pages.
Before choosing, consider:
- the amount of information per recipe;
- whether recipes occupy one page or two;
- whether the book will use colour photography;
- expected page count;
- printing cost;
- typical competitor dimensions;
- how the book will be held or positioned while cooking.
Do not begin with an arbitrary Canva template and attempt to force it into the chosen KDP dimensions later.
Step 6: Decide Whether the Cookbook Needs Bleed
Bleed is needed when photographs, colours or design elements extend to the edge of the printed page.
A no-bleed cookbook keeps all visual elements inside the final trim boundaries, leaving visible space around the page edges.
A bleed cookbook may contain:
- full-page food photography;
- coloured backgrounds;
- decorative bands touching an outside edge;
- illustrations extending beyond the page;
- section openers with edge-to-edge artwork.
KDP instructs publishers to extend edge-to-edge artwork by 0.125 inches beyond the final trim on the top, bottom and outside edges. For a bleed manuscript, the page width increases by 0.125 inches and the height by 0.25 inches. Kindle Direct Publishing
For example:
8.5 × 11-inch trim size
No-bleed document
8.5 × 11 inches
Bleed document
8.625 × 11.25 inches
The bleed setting applies to the manuscript file, not merely to the pages containing edge-to-edge images.
KDP requires a PDF when the manuscript contains bleed.
Step 7: Calculate the Margins and Gutter
Margins keep important content away from the cut edges.
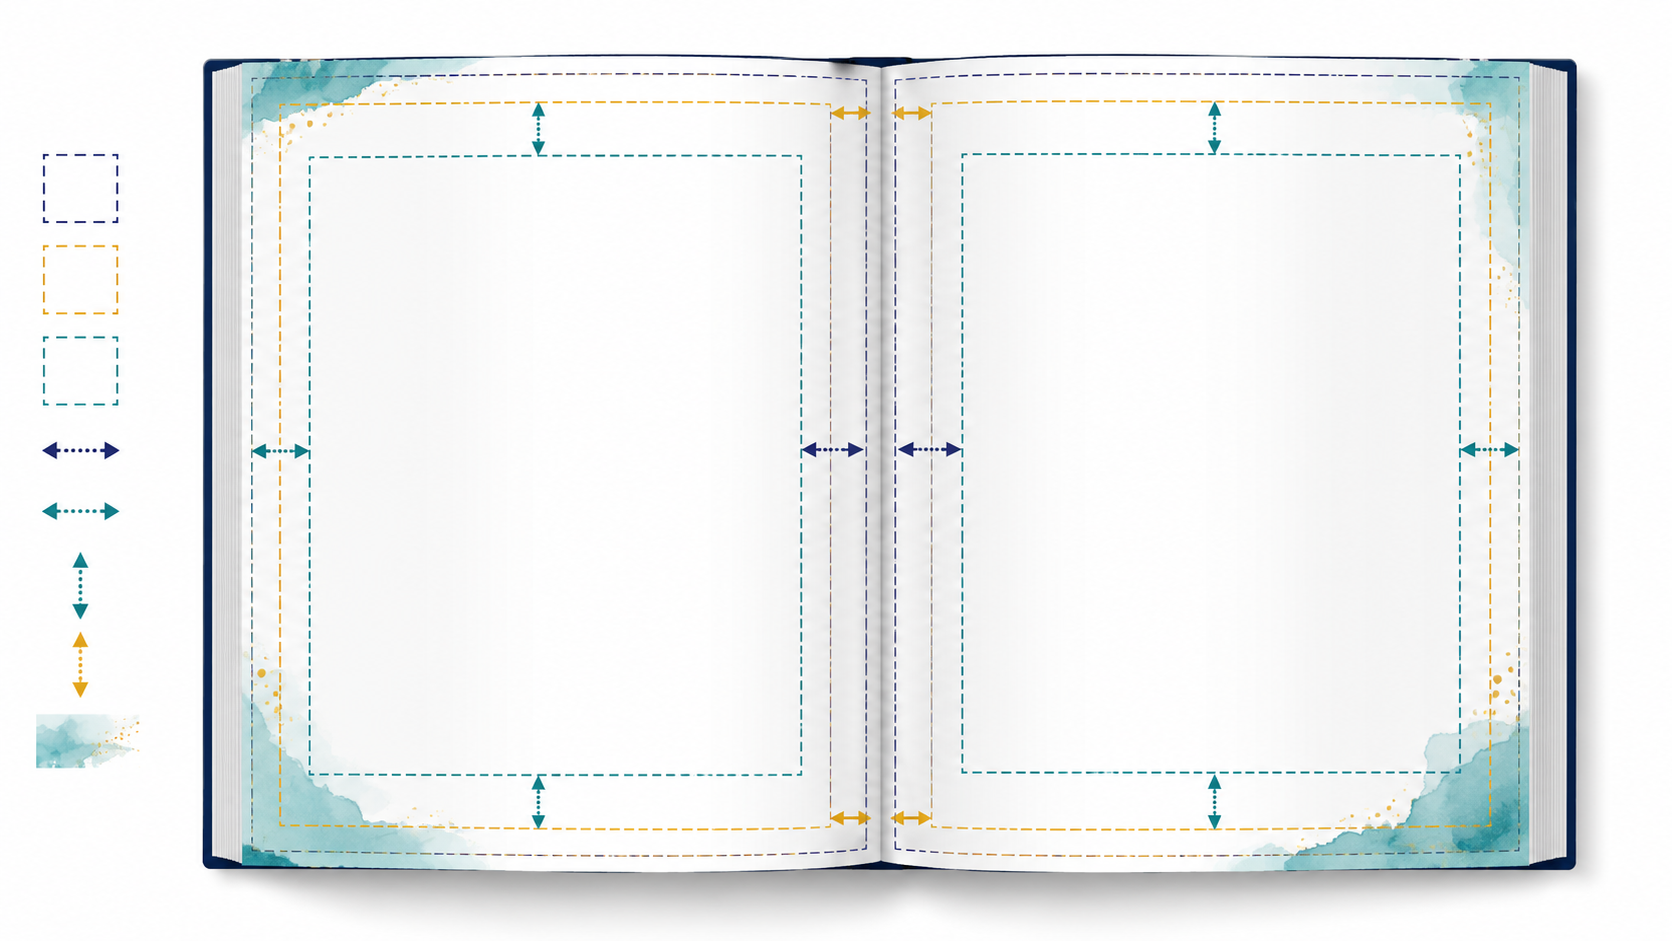
The gutter is the inside margin beside the binding. It needs enough room to stop ingredients and instructions from becoming uncomfortable to read when the book is open.
KDP’s minimum inside margin depends on the final page count. Its outside, top and bottom requirements also differ according to whether the manuscript uses bleed. Kindle Direct Publishing
For a practical cookbook, avoid designing only to the smallest technically accepted margin.
Recipe pages need breathing space.
Give special attention to:
- ingredient lists beside the gutter;
- page numbers;
- icons near the outside edge;
- captions beneath photographs;
- text placed over coloured backgrounds;
- decorative borders;
- two-page photographic spreads;
- headings crossing the centre.
Do not place measurement quantities so close to the binding that readers must force the book flat to see them.
When estimating margins in Canva, remember that a visual guide is only as accurate as the page setup you created. The final document dimensions and content placement must still satisfy the selected KDP specifications.
KDP Trim Size, Bleed and Margins Explained: A Beginner’s Formatting Guide
Step 8: Create the Canva Document at the Correct Size
Create a custom-size Canva document using the dimensions required for the finished manuscript.
For a no-bleed 8.5 × 11-inch cookbook, create the document at:
8.5 × 11 inches
For an 8.5 × 11-inch cookbook using bleed, create it at:
8.625 × 11.25 inches
Do not assume that choosing a generic “cookbook” template automatically creates the correct KDP page size.
After creating the document, set up visual guides for:
- the trim boundary;
- the safe content area;
- the inside gutter;
- the outside margin;
- the top and bottom margins;
- repeated page-number positions;
- consistent image and text columns.
Canva allows users to show print bleed, margins, rulers and related layout guides from the design settings. Its print-bleed view displays a dashed boundary to help identify artwork that should extend beyond the trim. Canva
Treat those guides as visual aids.
Your own KDP measurements remain the production standard.
Important Limitation: Canva Is Not a Traditional Book-Layout Program
Canva is convenient and approachable, but it does not behave exactly like dedicated publishing software.
Traditional layout applications commonly offer features such as:
- master pages;
- automatic facing-page behaviour;
- advanced text styles;
- automatic page numbering;
- linked text frames;
- sophisticated indexes;
- automatic tables of contents;
- preflight tools.
In Canva, you may need to manage more of these elements manually.
That does not mean Canva cannot produce a good cookbook.
It means your system must be disciplined.
You need to:
- create reusable page designs;
- maintain consistent spacing;
- verify left- and right-page differences;
- update page numbers carefully;
- inspect every page after duplication;
- avoid introducing accidental variations.
For a modest cookbook, Canva may be sufficient. For a very large or technically complex publication, software such as Affinity Publisher or Adobe InDesign may provide stronger long-document controls.
Step 9: Establish the Cookbook’s Visual System
Before designing individual recipe pages, define the visual rules for the entire book.
Colour palette
Choose a restrained palette appropriate to the cookbook’s subject.
For example:
- muted green and cream for plant-forward cooking;
- navy and warm gold for premium festive recipes;
- coral and soft yellow for family meals;
- black, white and earthy neutrals for modern high-protein recipes.
Use accent colours to organise information, not merely to decorate the page.
Typography
Choose:
- one display typeface for recipe and section titles;
- one highly readable typeface for ingredients and instructions;
- an optional accent style for short notes.
Avoid using too many fonts.
The body type must remain comfortable at the printed size. KDP requires text to remain legible and indicates that manuscript text should generally be at least seven points, though a cookbook usually benefits from larger body text for practical use. Kindle Direct Publishing
Photography style
Decide whether images will use:
- overhead photography;
- three-quarter food photography;
- dark and moody lighting;
- bright natural lighting;
- isolated dishes on clean backgrounds;
- illustrated food rather than photographs.
Icon system
If you use icons for time, servings, heat or difficulty, keep them:
- visually consistent;
- identical in size;
- easy to interpret;
- limited to genuinely useful fields.
Spacing
Establish consistent measurements between:
- title and introduction;
- ingredient lines;
- instruction steps;
- photographs and captions;
- recipe sections;
- page edges.
A strong visual system makes the book feel deliberate even when the recipes vary greatly in length.
Step 10: Design the Most Difficult Recipe First
Do not begin the master layout using the shortest recipe in the book.
Choose one of the most demanding recipes:
- a long title;
- a substantial introduction;
- many ingredients;
- several preparation steps;
- a storage note;
- a substitution note;
- a photograph;
- nutrition information.
If the layout works for a realistic difficult recipe, it can usually be simplified for shorter entries.
Designing with the easiest recipe creates a false sense of space. The layout may collapse as soon as you insert longer material.
Your initial test page should answer:
- Is the recipe title readable without dominating the page?
- Can the full ingredient list fit without reducing the type excessively?
- Are numbered steps comfortably separated?
- Is the photograph still useful at the available size?
- Does the page feel balanced rather than crowded?
- Can the reader find time, servings and temperature quickly?
- Does the gutter remain clear?
- Is any essential content dangerously close to the trim edge?
Do not proceed to dozens of pages until this difficult recipe works.
Step 11: Build a Small Recipe-Layout System
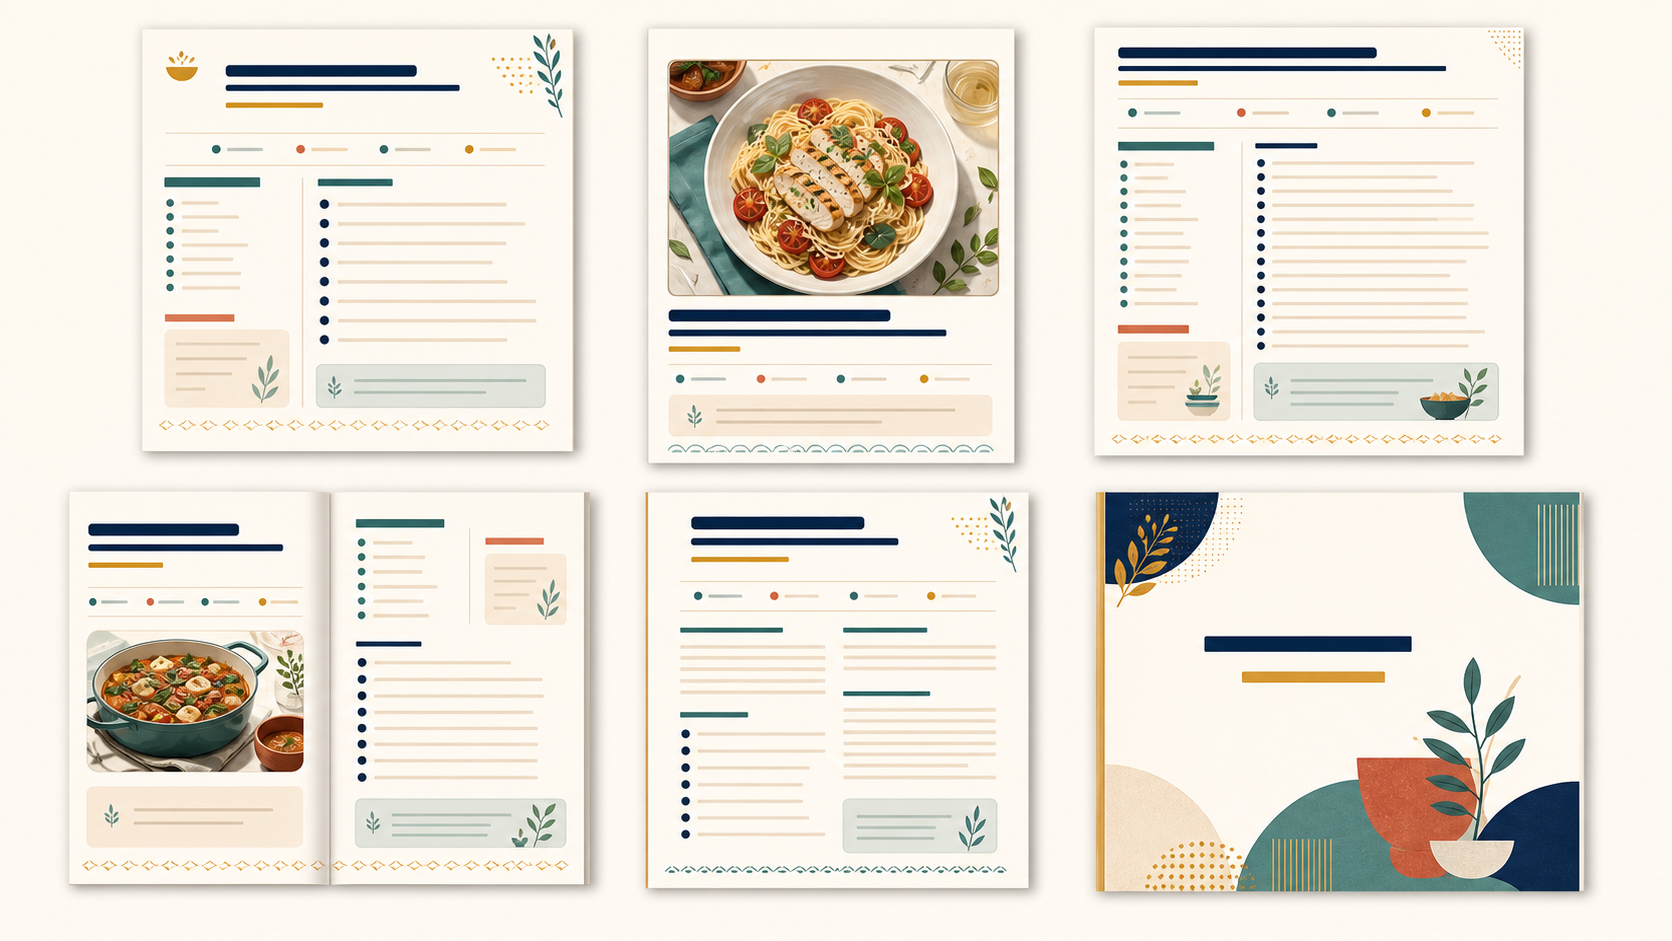
One layout will not accommodate every recipe gracefully.
Instead, create a family of related page types.
A practical cookbook system may use five or six.
Layout 1: Standard one-page recipe
Suitable for recipes with moderate ingredient and instruction lengths.
Possible structure:
- title and short introduction at the top;
- time and servings row;
- ingredients in a narrow column;
- instructions in a wider column;
- photograph in the upper or lower section;
- small tip box.
Layout 2: Short recipe with large photograph
Suitable for drinks, sauces, simple snacks or recipes containing few steps.
The photograph can occupy more space while the recipe remains complete and readable.
Layout 3: Long one-page recipe
Suitable when the recipe is only slightly too long for the standard design.
Possible adjustments:
- smaller photograph;
- shorter introduction;
- reduced decorative space;
- wider instruction area;
- notes moved to a concise callout.
Do not solve the problem by shrinking the body type until it becomes uncomfortable.
Layout 4: Two-page feature recipe
Suitable for complex or visually important recipes.
One possible spread:
Left page
- large photograph;
- recipe introduction;
- times, yield and difficulty;
- ingredients.
Right page
- full method;
- tips;
- substitutions;
- storage guidance.
Layout 5: Recipe without a photograph
Useful when photography is unavailable or when a reference-style presentation is appropriate.
The extra space can support:
- more detailed technique explanations;
- variations;
- serving combinations;
- troubleshooting.
Layout 6: Section opener
Use this before breakfast, dinner, desserts or another major category.
It may contain:
- the section name;
- a short introduction;
- one hero image;
- a simple decorative motif.
These layouts should clearly belong to the same book.
Keep the typography, colours, icons and spacing system consistent while changing the proportions.
“Visual consistency does not require identical pages. It requires related pages built from the same design language.”
Step 12: Create Separate Left- and Right-Page Versions
A printed book alternates between left-hand and right-hand pages.
The inside gutter therefore changes sides.
On a right-hand page, the gutter is on the left.
On a left-hand page, the gutter is on the right.
If your recipe layout is asymmetrical, create separate versions for both page positions.
For example:
- a photograph near the outside edge should move when the page side changes;
- page numbers should alternate between lower-left and lower-right positions;
- the ingredient column beside the binding may need extra inward spacing;
- decorative elements should not accidentally enter the gutter.
Name the designs clearly:
- Standard Recipe — Left
- Standard Recipe — Right
- Long Recipe — Left
- Long Recipe — Right
- Section Opener — Right
This is more reliable than duplicating one page and manually remembering to mirror every relevant element.
Step 13: Duplicate Layouts—Do Not Rebuild Them
Once the layout system has been tested, duplicate the appropriate page and replace the content.
Do not rebuild the page for every recipe.
When replacing content, check:
- the old recipe title has been completely removed;
- no ingredient remains from the previous page;
- all instructions belong to the new recipe;
- preparation and cooking times have been updated;
- servings are correct;
- the photograph matches the recipe;
- captions and notes have been changed;
- page numbers remain correct;
- the layout still corresponds to the correct left or right page;
- no text has been hidden behind an image or decorative object.
Duplication saves time, but it creates a new risk: leftover content.
A professional-looking recipe page containing one ingredient from a previous recipe is still an editorial failure.
Use a replacement checklist every time.
Step 14: Use Text Styles Consistently
Define the visual style for each type of text.
For example:
| Text type | Suggested treatment |
|---|---|
| Section title | Large display type |
| Recipe title | Strong heading |
| Recipe introduction | Short paragraph |
| Time and servings | Compact information style |
| Ingredient heading | Small strong heading |
| Ingredient items | Readable body type |
| Method heading | Small strong heading |
| Method steps | Numbered body text |
| Tip label | Accent style |
| Tip body | Smaller supporting text |
| Page number | Quiet navigation style |
The exact font sizes depend on the trim size, typeface and intended audience.
The important principle is hierarchy.
A reader should be able to scan the page and immediately recognise:
- the recipe name;
- how long it takes;
- how much it makes;
- what ingredients are required;
- where the method begins.
Do not make every item bold or colourful. When everything demands attention, the page has no hierarchy.
Step 15: Format Ingredients for Real Kitchen Use
Ingredient lists must be easy to scan while the reader is cooking.
Use consistent formatting for:
- measurement units;
- fractions;
- capitalisation;
- ingredient preparation;
- optional ingredients;
- divided ingredients.
Compare these entries:
2 onions chopped
2 medium onions, finely chopped
The second is clearer.
Keep the quantity near the beginning of each line.
A consistent pattern might be:
Quantity + unit + ingredient + preparation
For example:
2 tablespoons olive oil
1 medium onion, finely chopped
400 grams canned tomatoes, drained
Salt and black pepper, to taste
Decide whether the cookbook will use:
- US customary measurements;
- metric measurements;
- both systems.
Do not switch unpredictably among cups, grams, ounces and millilitres.
When both systems are included, choose a consistent presentation rather than converting only selected ingredients.
For recipes containing several components, divide the ingredients using clear subheadings such as:
- For the filling
- For the sauce
- To finish
Keep those subheadings visually subordinate to the main recipe title.
Step 16: Format Instructions for Clarity
Recipe instructions should be sequential, specific and easy to follow.
Use numbered steps rather than a single dense paragraph.
A strong step usually begins with a clear action:
- Preheat
- Combine
- Whisk
- Fold
- Transfer
- Bake
- Rest
- Serve
Avoid unnecessary repetition, but do not compress several difficult actions into one confusing sentence.
For example:
Mix everything and bake until done.
This is too vague.
A clearer version might be:
- Whisk the eggs, milk and seasoning in a medium bowl until evenly combined.
- Fold in the chopped vegetables and half of the cheese.
- Transfer the mixture to the prepared dish and sprinkle the remaining cheese on top.
- Bake for 22–25 minutes, or until the centre is set.
Where relevant, include visual or physical signs of doneness rather than relying only on time.
Readers’ ovens, air fryers and ingredients may behave differently.
However, keep the instructions appropriate to the book’s intended level. A beginner cookbook should explain techniques that an expert text might assume.
Step 17: Use Food Photography Consistently
Food photography strongly influences the perceived quality of a cookbook.
A collection of individually attractive images can still feel unprofessional when the visual styles conflict.
Avoid mixing:
- dark restaurant-style photographs;
- bright stock images;
- flat vector illustrations;
- casual phone pictures;
- AI-generated images with different levels of realism;
- dishes shown from unrelated camera angles.
Choose a repeatable visual direction.
For example:
Bright natural food photography, soft side lighting, warm neutral table surface, high three-quarter camera angle, shallow depth of field, realistic portions and restrained styling.
Create a visual brief containing:
- lighting;
- camera angle;
- background;
- plates and props;
- colour palette;
- portion presentation;
- image orientation;
- level of realism.
KCanvas can help you create a consistent family of visual prompts based on the cookbook concept. Canva can then be used to crop and position the resulting licensed, commissioned or original imagery.
Every photograph should:
- resemble the actual dish;
- show a plausible result;
- have enough resolution for its printed size;
- be legally usable;
- avoid misleading garnishes or ingredients;
- be checked carefully for visual errors.
KDP recommends high-resolution manuscript images and describes 300 DPI as the standard for high-resolution print imagery. Kindle Direct Publishing
Step 18: Crop Images Without Hiding the Food
A Canva image frame may not share the same proportions as the original photograph.
When filling the frame, the software may crop:
- the top of the dish;
- important garnishes;
- utensils;
- the plate edge;
- the main point of focus.
Inspect each crop manually.
Do not assume that replacing an image inside an existing frame produces an acceptable composition.
Keep the main dish away from:
- the gutter;
- trim boundaries;
- overlaid text;
- decorative labels;
- areas where captions may cover it.
For edge-to-edge photographs, extend the image fully through the bleed area.
Do not stop the photograph exactly at the trim boundary, since small cutting variation can create a visible white edge. KDP’s bleed guidance requires edge-reaching artwork to extend beyond the final trim area. Kindle Direct Publishing
Step 19: Avoid Placing Essential Text Over Photographs
Text over food photography may look attractive in a digital mock-up but become difficult to read in print.
Problems include:
- insufficient contrast;
- busy backgrounds;
- light text crossing highlights;
- dark text crossing shadows;
- text entering the trim area;
- inconsistent readability from one photograph to another.
For section openers or short feature titles, an overlay may work when the background is carefully controlled.
For ingredient lists and methods, use a plain or highly restrained text area.
Readers may consult the cookbook under uneven kitchen lighting. Practical readability is more important than reproducing a social-media graphic style.
Step 20: Add Section Openers Deliberately
Section-opening pages help readers understand the structure of the book.
They can separate categories such as:
- Breakfast;
- Lunch;
- Dinner;
- Snacks;
- Desserts;
- Sauces;
- Drinks.
A section opener may contain:
- the section name;
- a brief introduction;
- a hero photograph;
- a small list of what the section covers;
- a useful preparation note.
Keep it visually simpler than a recipe page.
Do not overload it with lengthy text merely to fill space.
Consider starting major sections on right-hand pages. This may require inserting a blank or decorative page before a section. Plan these transitions before finalising the table of contents and page count.
Step 21: Keep Front Matter Short and Useful
Many cookbook introductions become unnecessarily long.
Readers usually bought the book to use the recipes.
Front matter should help them succeed.
Useful front-matter topics may include:
- what makes the cookbook different;
- who it is for;
- how recipes are organised;
- how measurements are presented;
- what equipment is assumed;
- how serving sizes work;
- safety or dietary disclaimers;
- important preparation principles.
Avoid filling several pages with generic statements about loving food.
A concise personal introduction is welcome when it supports the book’s credibility or purpose, but it should lead naturally into the practical content.
Step 22: Create the Table of Contents After Pagination Stabilises
Plan the table of contents early, but insert final page numbers late.
Recipe pages can shift while you:
- change layouts;
- add section openers;
- divide long recipes;
- insert blank pages;
- modify photography;
- correct content;
- adjust front matter.
KDP’s own manuscript-template guidance recommends finalising the main content before completing table-of-contents page numbers because the pagination can change during formatting. Kindle Direct Publishing
For a cookbook, decide whether the table of contents will list:
- only major sections;
- every recipe;
- sections with selected recipes;
- separate indexes for ingredients or recipe names.
A 100-recipe book may produce a long table of contents. Consider whether a clearly organised recipe index would be more useful than forcing every title into the opening pages.
Step 23: Build the Recipe Index Outside Canva
A recipe index can make the cookbook significantly easier to use.
Possible index types include:
- alphabetical recipe index;
- ingredient index;
- dietary category index;
- cooking-time index;
- meal-type index.
Creating a detailed index manually inside Canva can be time-consuming.
Maintain the index data in a spreadsheet while developing the book.
Useful fields include:
| Recipe | Page | Main ingredient | Category | Cooking method |
|---|---|---|---|---|
| Recipe A | 24 | Chicken | Dinner | Air fryer |
| Recipe B | 31 | Potatoes | Side dish | Air fryer |
| Recipe C | 58 | Apples | Dessert | Baking |
When pagination is final, sort and format the relevant information for the index pages.
Verify every referenced page before exporting.
Step 24: Check Page Order and Facing-Page Relationships
A Canva document may be viewed as a vertical sequence of separate pages, but the printed cookbook will be experienced in spreads.
Review the interior as pairs:
- pages 2 and 3;
- pages 4 and 5;
- pages 6 and 7.
Ask:
- Does a section opener begin on the intended side?
- Does a two-page recipe remain together?
- Is an ingredient list separated from its instructions?
- Do two full-page photographs face each other awkwardly?
- Are two highly dense pages paired without visual relief?
- Does an intentionally blank page appear where expected?
- Are page numbers alternating correctly?
A two-page recipe should begin on a left-hand page when the intention is for the entire recipe to be visible as one spread.
This requires pagination planning. A beautiful spread is not useful when half of it appears after a page turn.
Step 25: Inspect Every Page at Printed Size
A design may look spacious when enlarged on a computer monitor and cramped when printed.
Use Canva’s zoom controls to inspect the design, but also print representative pages at actual size.
Print at least:
- one standard recipe;
- one long recipe;
- one two-page recipe;
- one section opener;
- one index page;
- one page containing small supporting text.
Check:
- body-text readability;
- ingredient spacing;
- icon size;
- photograph quality;
- page-number position;
- gutter comfort;
- colour contrast;
- whether the page feels crowded.
A physical test page can reveal problems that are easy to miss on screen.
Step 26: Run a Three-Recipe Stress Test
Before formatting the whole cookbook, test the design using three deliberately different recipes.
Stress-test recipe one: Long ingredients
Choose a recipe with many ingredients or several components.
This tests:
- ingredient-column capacity;
- subheading spacing;
- line wrapping;
- measurement consistency.
Stress-test recipe two: Long method
Choose a recipe with many preparation steps.
This tests:
- numbered-step spacing;
- instruction hierarchy;
- page flow;
- whether a two-page layout is needed.
Stress-test recipe three: Long title and notes
Choose a recipe with a long name, introduction, substitutions and storage guidance.
This tests:
- heading capacity;
- tip-box size;
- layout flexibility;
- whether supporting information remains readable.
Do not format the complete cookbook until all three can be accommodated without reducing the body type excessively.
Step 27: Perform a Content-Consistency Audit
After all recipes have been placed, search systematically for inconsistencies.
Create a house-style checklist covering:
- tablespoon versus tbsp.;
- teaspoon versus tsp.;
- gram versus g;
- Fahrenheit and Celsius formatting;
- capitalisation of ingredient names;
- hyphenation;
- numbered-step punctuation;
- serving notation;
- time notation;
- spelling style;
- optional ingredient labels;
- storage language;
- page-title capitalisation.
Also inspect recipe order.
Check that:
- difficulty progresses sensibly where intended;
- similar recipes are not unintentionally adjacent;
- section names match the table of contents;
- every promised recipe is present;
- no recipe appears twice;
- page references remain correct;
- front matter accurately describes the finished book.
The visual design cannot compensate for inconsistent or unreliable recipe content.
Step 28: Export the Interior from Canva
When the interior is final, export it as a print-quality PDF.
Canva provides a PDF Print option intended for higher-quality printed output. Its download options can include bleed, crop marks and colour-profile choices depending on the design and account features. Canva
Before exporting:
- Confirm that all intended pages are selected.
- Check the final page order.
- Confirm that no design guides are visible as actual page elements.
- Remove comments, placeholders and temporary notes.
- Ensure all photographs have loaded fully.
- Confirm that page numbers are correct.
- Inspect intentionally blank pages.
- Verify that the document dimensions match the selected KDP setup.
For a KDP interior, do not add printer crop marks merely because the option exists.
KDP requires the page file itself to have the correct dimensions. Crop marks are not a substitute for a correctly sized manuscript.
After downloading, reopen the PDF outside Canva.
Do not upload it without inspecting the exported file.
Step 29: Inspect the Exported PDF
The exported PDF is the actual product KDP will process.
Review it page by page.
Check:
- page width and height;
- total page count;
- page order;
- image sharpness;
- missing images;
- font appearance;
- ingredient alignment;
- clipped text;
- unexpected line breaks;
- missing page numbers;
- blank pages;
- bleed coverage;
- gutter safety;
- section transitions;
- table-of-contents references;
- index references;
- leftover placeholder text.
KDP advises publishers to save formatted manuscripts as PDFs for reliable results and to ensure fonts are embedded. Kindle Direct Publishing
You should also check whether the exported PDF retained the intended physical page dimensions. A file that visually resembles the design can still be incorrectly sized for the chosen trim.
Step 30: Audit the PDF with KCanvas
Canva helps you create the visual interior.
It does not independently confirm that the exported cookbook satisfies every selected KDP measurement.
Run the PDF through the KCanvas KDP PDF Auditor before uploading it.
Use the auditor to inspect areas such as:
- page-size consistency;
- expected trim dimensions;
- bleed configuration;
- unsafe content near page edges;
- inside and outside margin risks;
- gutter placement;
- unusual page variations;
- likely print-readiness problems.
This adds an inspection stage between Canva and KDP.
The workflow becomes:
Plan in KCanvas → Design in Canva → Export the PDF → Audit in KCanvas → Inspect in KDP
The KCanvas audit should not replace your own page-by-page review or KDP’s Previewer.
It helps identify likely problems earlier, while you can still return to Canva and correct the source pages.
Step 31: Upload and Review the KDP Preview
After uploading the manuscript, use KDP’s previewing process to inspect the book.
KDP checks files for issues involving areas such as page dimensions, margins, fonts and content positioning. Problems generally need to be corrected in the original document before a revised file is exported and uploaded. Kindle Direct Publishing
Review every page, even when the system does not highlight an error.
Automated checks may not recognise:
- awkward text hierarchy;
- a photograph paired with the wrong recipe;
- an ingredient accidentally left from another page;
- inconsistent icon sizes;
- poor page-to-page rhythm;
- a section opener beginning on the wrong side;
- an inaccurate table of contents;
- a visually crowded layout.
Technical acceptance does not prove editorial quality.
Step 32: Finalise the Cover Only After the Interior
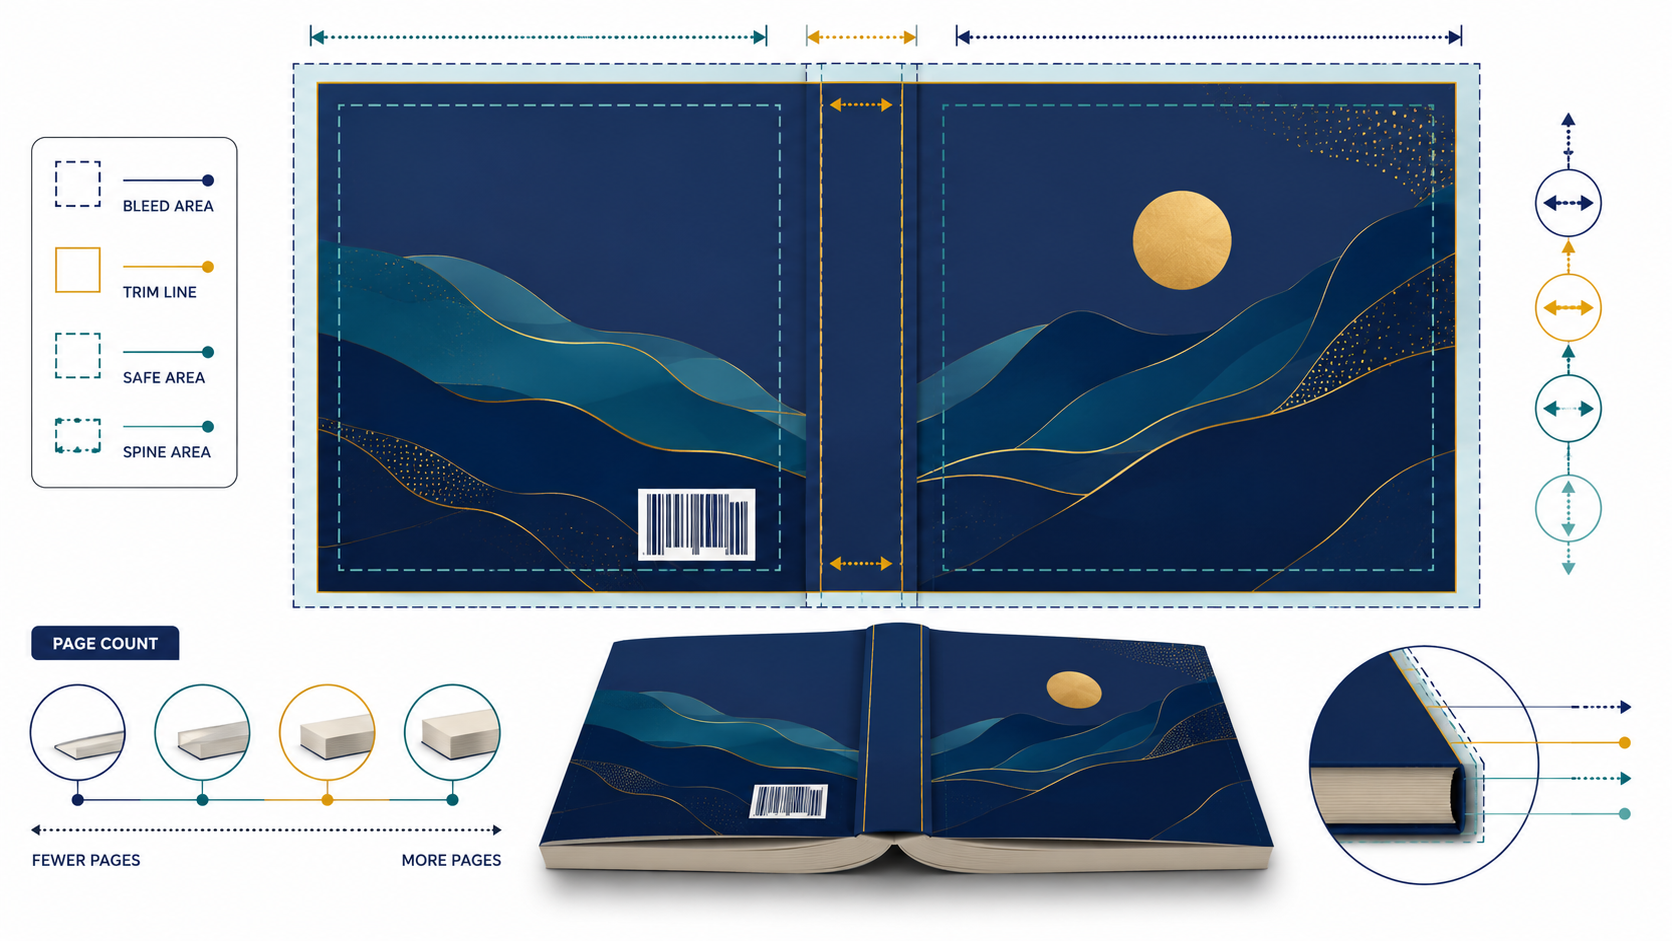
The complete paperback cover depends partly on the interior’s final page count because page count affects spine width.
Do not finalise the wraparound cover while the cookbook is still gaining or losing pages.
KDP recommends completing the interior first and using the final page count when preparing the cover. Its Cover Calculator can generate exact dimensions and downloadable guide templates based on the book’s trim size, print options, paper type and page count. Kindle Direct Publishing
The full cover includes:
- back cover;
- spine;
- front cover;
- exterior bleed.
KDP Cover Size and Spine Width Explained: A Complete Paperback Guide
Common Canva Cookbook Mistakes
1. Choosing the template before choosing the trim size
A visually attractive Canva template may not match the final KDP page dimensions.
2. Using only one recipe layout
Short and long recipes rarely fit the same page gracefully.
3. Designing with the shortest recipe first
The layout then fails when realistic longer content is added.
4. Shrinking the body text to make everything fit
This may solve a spacing problem while creating a readability problem.
5. Forgetting the gutter
Ingredients and instructions can become uncomfortable to read near the binding.
6. Treating every page as a separate design
The book becomes visually inconsistent and unnecessarily slow to produce.
7. Duplicating pages without checking leftover content
Old ingredients, times or photographs may remain in the new recipe.
8. Using inconsistent food photography
The interior feels like a collection of unrelated sources.
9. Adding full-page photographs without bleed
Small trimming variation may leave white edges.
10. Placing essential information over photographs
Ingredients and instructions become difficult to read.
11. Adding crop marks during export without understanding them
Crop marks do not correct an inaccurately sized manuscript.
12. Completing the table of contents too early
Later pagination changes make the page references inaccurate.
13. Finalising the cover before the page count
The spine width can become incorrect.
14. Trusting the editable Canva file instead of inspecting the PDF
Exporting can reveal issues that were not obvious in the editor.
15. Assuming KDP acceptance means the cookbook is professionally designed
A technically accepted file may still contain editorial and visual problems.
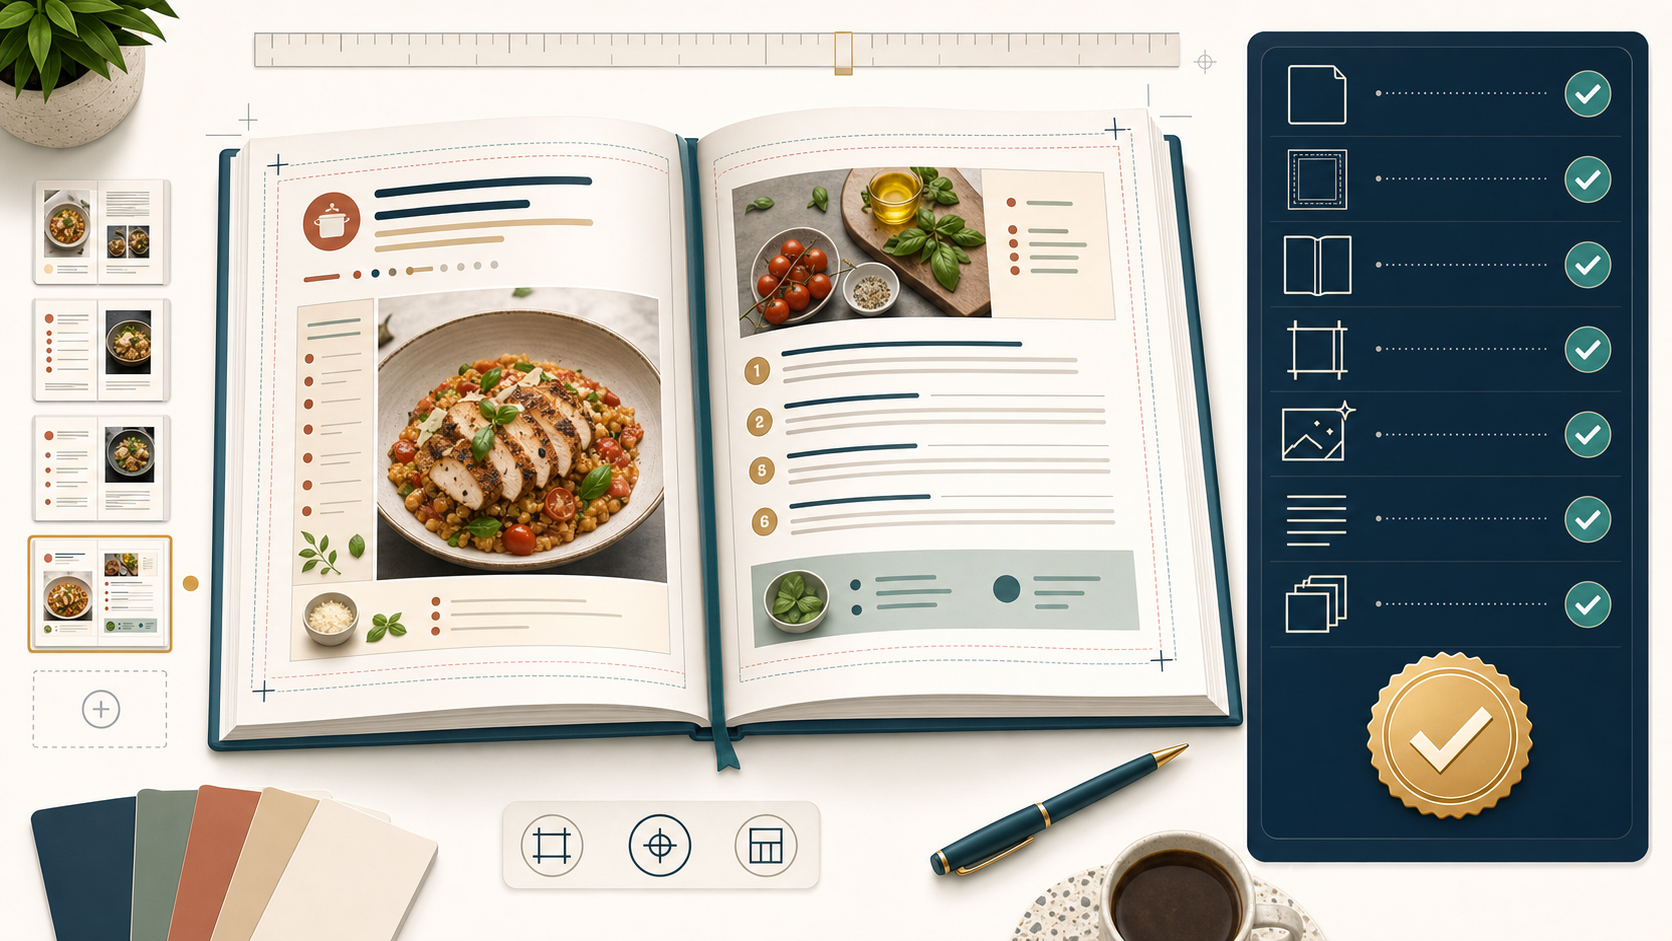
Canva Recipe Book Production Checklist
Before creating the Canva document, confirm that:
- The target reader is clearly defined.
- The cookbook has a specific promise.
- The main recipe categories are settled.
- The complete recipe inventory exists.
- Every recipe follows a standard content structure.
- The recipes have been edited before formatting.
- The approximate page count has been estimated.
- Colour or black-and-white printing has been chosen.
- The estimated printing cost and royalty have been reviewed.
- The trim size has been selected.
- The bleed decision has been made.
- The document dimensions have been calculated.
- The margin and gutter requirements are understood.
Before duplicating recipe pages, confirm that:
- The visual style is defined.
- The typography hierarchy is consistent.
- The food-photography direction is defined.
- Standard left- and right-page versions exist.
- A standard recipe layout has been tested.
- A long-recipe layout exists.
- A short-recipe layout exists.
- A two-page recipe layout exists.
- A section-opening design exists.
- Three difficult recipes have passed the stress test.
Before exporting, confirm that:
- Every recipe title is correct.
- Every ingredient belongs to the correct recipe.
- Every method matches its ingredient list.
- Times, servings and temperatures are present.
- Images match the recipes.
- Image crops have been checked.
- Page numbers are correct.
- Section openers begin on the intended pages.
- Two-page recipes remain together.
- The table of contents is accurate.
- The recipe index is accurate.
- Blank pages are intentional.
- No placeholder text remains.
- All essential content is inside the safe area.
- Background artwork extends through the bleed where required.
After exporting, confirm that:
- The PDF has the correct physical dimensions.
- The PDF has the expected page count.
- The pages remain in the correct order.
- Fonts display properly.
- Images remain clear.
- No text is cut off.
- No elements moved unexpectedly.
- The file has been audited in KCanvas.
- Every page has been reviewed in KDP’s previewing process.
- A physical proof has been considered before publication.
The Smarter KCanvas-and-Canva Workflow
KCanvas and Canva should perform different jobs within the project.
Use KCanvas for publishing intelligence
Use KCanvas to support:
- audience and niche research;
- cookbook concept development;
- title and subtitle planning;
- category architecture;
- table-of-contents development;
- recipe-content planning;
- consistent visual-prompt creation;
- final PDF auditing.
Use Canva for visual construction
Use Canva to:
- establish the page dimensions;
- create the typography and colour system;
- build reusable recipe layouts;
- position food photographs;
- construct section openers;
- duplicate pages;
- create reference charts;
- export the print-quality PDF.
Return to KCanvas for quality control
After exporting:
- inspect the PDF dimensions;
- check margins and unsafe areas;
- review bleed behaviour;
- identify page inconsistencies;
- correct the Canva source file;
- export a revised PDF.
This division of responsibility prevents Canva from becoming the place where every research, content, design and technical decision is made at once.
A Worked Example: Building a 100-Recipe Air-Fryer Cookbook
Imagine that you are creating a beginner air-fryer cookbook containing 100 recipes.
Step 1: Define the promise
Simple, practical air-fryer recipes for beginners who want familiar meals without complicated ingredients.
Step 2: Divide the recipes
| Section | Recipes |
|---|---|
| Breakfast | 12 |
| Chicken | 18 |
| Beef and pork | 14 |
| Fish and seafood | 10 |
| Vegetables and sides | 18 |
| Snacks | 14 |
| Desserts | 14 |
| Total | 100 |
Step 3: Define the recipe fields
Every recipe includes:
- preparation time;
- cooking time;
- temperature;
- servings;
- basket arrangement;
- ingredients;
- numbered method;
- turning or shaking guidance;
- beginner tip;
- storage guidance.
Step 4: Create layout categories
After reviewing the recipes, you discover:
- 55 fit the standard one-page layout;
- 20 need the long one-page layout;
- 15 are short enough for large-photo layouts;
- 10 need two-page spreads.
Step 5: Estimate the page count
The recipe pages alone may use:
- 55 standard pages;
- 20 long pages;
- 15 large-photo pages;
- 20 pages for the ten two-page recipes.
That creates 110 recipe pages.
Add:
- front matter;
- seven section openers;
- equipment guidance;
- cooking charts;
- table of contents;
- index;
- back matter.
The finished book may reach approximately 135–150 pages.
This estimate lets you calculate likely printing costs and select more realistic margins before the entire book is formatted.
Step 6: Build the Canva system
Create:
- standard-left recipe;
- standard-right recipe;
- long-left recipe;
- long-right recipe;
- large-photo-left recipe;
- large-photo-right recipe;
- two-page spread;
- section opener;
- reference page;
- index page.
Step 7: Produce sequentially
Format one section completely before building all 100 recipes.
This lets you identify:
- overcrowded ingredient lists;
- inconsistent photography;
- weak spacing;
- missing recipe information;
- inefficient page types.
Correct the system before repeating it across the rest of the book.
What Not to Automate
A repeatable production system can save time, but not every decision should be automated.
Do not automatically trust:
- generated recipe quantities;
- generated nutritional information;
- generated cooking times;
- generated food-safety advice;
- image-to-recipe accuracy;
- automatic page fitting;
- bulk text replacement;
- duplicated times or serving values;
- page-number sequences;
- index references.
Use automation for organisation and repetition.
Retain human review for accuracy, safety, clarity and quality.
The objective is not to remove judgment from cookbook creation.
It is to reserve judgment for the decisions where it matters most.
Final Thoughts
Creating a recipe book in Canva becomes difficult when every recipe is treated as a separate design problem.
A better workflow begins before Canva.
Define the reader. Clarify the promise. Organise the sections. Standardise the recipe information. Edit the content. Choose the print setup. Then build a small family of layouts capable of holding the real recipes.
Use the difficult recipes to test the system.
Use Canva to duplicate and adapt tested layouts rather than repeatedly rebuilding pages.
When the book is complete, inspect the exported PDF—not merely the editable design. Audit the file with KCanvas, correct the source document and review every page again through KDP.
The goal is not just to make a beautiful recipe page.
It is to create an entire cookbook that remains clear, consistent and print-ready from the first recipe to the last.